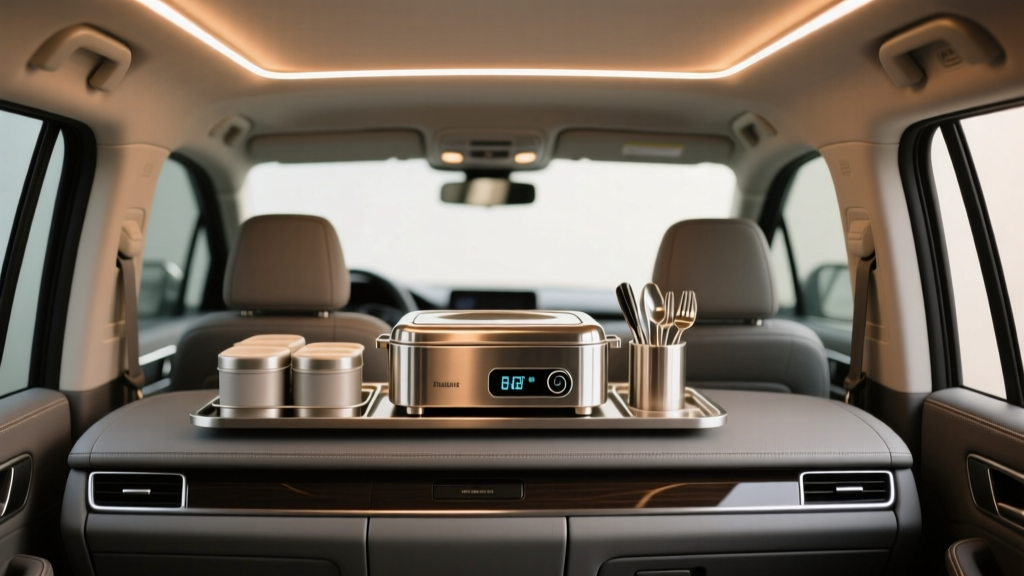
Commercial Vehicle Food Warmer Setup Guide - CarInteriorMix
If you drive a commercial vehicle for work?delivery van, service truck, tow rig, or even a long-haul pickup?your cab is more than transportation. It?s your mobile office, break room, and sometimes the only place you?ll get a real meal between stops. A properly set up food warmer can turn rushed, expensive fast-food runs into consistent hot meals that save time, money, and frustration.
But the ?plug it in and hope? approach can drain batteries, blow fuses, melt cheap plastics, or leave you with lukewarm food at the worst moment. This guide walks through the smartest ways to set up a commercial vehicle food warmer?safely, cleanly, and in a way that fits your driving schedule.
Whether you?re warming pre-cooked meals, keeping coffee hot, or heating a lunch on a route, you?ll find practical setup steps, product comparisons, and real-world tips that apply to most 12V/24V vehicle electrical systems.
Know Your Options: Types of Vehicle Food Warmers
Commercial vehicle ?food warmer? can mean a few different products. Choosing the right category matters more than brand names because each type draws different power and works best for different foods.
12V/24V Plug-In Lunch Boxes (Pouch or Hard-Shell)
- Best for: Warming pre-cooked meals (rice, pasta, chicken, leftovers) gradually.
- Power source: 12V cigarette-lighter socket or 24V for larger trucks (sometimes dual-voltage).
- Pros: Simple, compact, low-to-moderate power draw, easy to store.
- Cons: Slower heating; not ideal for raw food cooking.
Portable Ovens (12V/110V Dual-Power)
- Best for: Heating thicker meals, casseroles, burritos, multi-compartment trays.
- Power source: 12V in vehicle; 110V/120V at home/warehouse.
- Pros: More consistent heat; useful off-vehicle too.
- Cons: Bulkier; some models pull higher amperage on 12V.
Heated Mugs and Small Plate Warmers
- Best for: Coffee, soup, or keeping something warm?not a full lunch.
- Pros: Minimal space; quick convenience.
- Cons: Limited use; spills are a real concern in moving vehicles.
Inverter + Household Food Warmer (Crock Pot, Mini Oven)
- Best for: Drivers who already have a quality household warmer and want flexibility.
- Pros: More appliance choices; can power multiple small devices.
- Cons: More complexity; higher electrical load; requires careful wiring and ventilation for the inverter.
Before You Buy: Power Planning for Commercial Vehicles
The safest setup starts with matching your warmer to your vehicle?s electrical reality. Most issues come from power mismatch, overloaded sockets, or ignoring how long the vehicle will be off while the warmer runs.
Step 1: Identify Your Electrical System (12V vs 24V)
- Most pickups, vans, and light-duty trucks: 12V system
- Many semis and heavy-duty commercial trucks: 24V system
Check your owner?s manual, the battery labels, or look for ?12V? / ?24V? printed near power outlets.
Step 2: Know Your Outlet Limits
Many factory 12V sockets are fused around 10A to 15A. That means the practical continuous power is roughly:
- 10A at 12V ? 120W
- 15A at 12V ? 180W
If the warmer?s label says 120W, it may be fine on a 10A circuit. If it says 150?200W, it may pop fuses or overheat the socket, especially with thin factory wiring.
Step 3: Estimate Runtime vs Battery Impact
A common real-world example: a 60W warmer running for 1 hour uses about 60Wh. That isn?t huge while the engine is running, but using it with the engine off can drain a starting battery faster than you think?especially in cold weather or with an older battery.
- Best practice: Run warmers while driving, or use an auxiliary battery/power station for long engine-off warm times.
Recommended Food Warmer Setups (By Use Case)
Setup A: The Simple 12V Plug-In Lunch Box (Most Drivers)
This is the best blend of cost, simplicity, and everyday usefulness for delivery routes and service calls.
- Look for: 12V compatibility, sealing lid, stainless insert, replaceable fuse in the plug, and a strap/carry handle.
- Ideal wattage range: 40W?80W for most factory sockets.
Setup B: Dual-Power Portable Oven (Warehouse + Road)
If you pack meals at home and also have access to shore power at a depot, a dual-power unit is convenient.
- Look for: 12V + 110/120V included cables, thermostat control (or stable heating), and a rigid insulated body.
- Ideal for: Drivers who want to preheat at the warehouse and keep food hot en route.
Setup C: Inverter-Based System (High Flexibility, Higher Risk)
This works when you need to power a household appliance, but it must be done correctly.
- Look for: a pure sine wave inverter for sensitive devices, proper gauge wiring, a fuse near the battery, and solid mounting with airflow.
- Good fit for: Owner-operators, overland builds, or vehicles with auxiliary power setups.
Step-by-Step: Installing and Using a Commercial Vehicle Food Warmer Safely
Step 1: Pick a Safe Location in the Cabin
Your goal is stability, ventilation, and minimal distraction.
- Choose a flat surface: passenger footwell, behind-center console area, or a seat-base platform.
- Keep it away from airbags, pedals, and gear selectors.
- Allow space around vents (don?t bury it under jackets or paperwork).
Step 2: Secure the Warmer So It Can?t Tip
Spilled hot food is annoying; spilled hot soup on a braking event is dangerous.
- Use a seat-belt loop, bungee cord to a cargo point, or a non-slip rubber mat.
- For vans: mount a small tie-down ring on the partition or use existing cargo anchors.
Step 3: Inspect the Power Cable and Plug
- Check for a built-in fuse in the 12V plug (many better units include one).
- Make sure the cable reaches without being stretched across shifter zones.
- Avoid running the cable where it can be pinched by a seat track.
Step 4: Plug Into the Correct Outlet
Prefer a dedicated 12V socket over a cheap splitter.
- If your vehicle has multiple outlets, use the one with the highest rating (check manual).
- If you must use a splitter, choose a fused, name-brand unit with a rating above your warmer?s draw.
Step 5: Preheat Strategy (Real-World Timing)
Most vehicle warmers are designed to warm, not sear. Timing is your advantage.
- Load pre-cooked food into a sealed container (or the included tray).
- Start warming 45?90 minutes before you plan to eat (varies by portion size and ambient temp).
- Stir once midway if possible, especially for dense foods like rice or pasta.
- Unplug when done to avoid over-drying and to reduce electrical load.
Step 6: Food Safety Basics for the Road
- Start with refrigerated, pre-cooked food stored in a cooler bag or 12V fridge.
- Don?t leave perishable food in a warm cab for hours before heating.
- If a meal smells ?off,? don?t gamble?commercial driving is not where you want food poisoning.
Product Features That Matter (Quick Comparison)
Instead of chasing the latest model, compare by these features:
- Voltage: 12V, 24V, or dual-voltage (especially for fleet vehicles that vary).
- Wattage: Lower wattage is easier on factory sockets; higher wattage heats faster but needs stronger wiring.
- Container type: Stainless insert is easier to clean than plastic.
- Seal quality: Better seals reduce smells in the cabin and prevent leaks.
- Cable length: Short cables force unsafe routing; 4?6 feet is usually comfortable.
- Protection: Replaceable fuse in the plug, overheat protection, and robust strain relief.
Practical Tips from Real-World Commercial Driving
- Pack ?warmer-friendly? meals: chili, stew, rice bowls, pasta bakes, pulled chicken, or burritos heat evenly and stay moist.
- Add a splash of water or sauce: prevents drying, especially for rice and reheated chicken.
- Use a leakproof inner container: even if the warmer has a tray?double containment saves interiors.
- Keep wipes and a small trash bag: quick cleanup prevents smells from living in your upholstery.
- Label meal containers: if you carry multiple meals, labels stop you from opening the wrong one mid-route.
Common Mistakes to Avoid
- Running high-watt devices on a weak socket: If you keep blowing fuses, that?s a warning sign, not an inconvenience.
- Using thin, cheap extension cords: Heat + undersized wire = voltage drop and hot plugs. Use a properly rated 12V extension if needed.
- Letting the unit slide around: Spills, cracked lids, and damaged plugs happen fast on rough roads.
- Blocking ventilation: Insulated warmers still need airflow around the body and plug.
- Leaving it plugged in overnight: Battery drain is real, and you don?t want a no-start at 5 a.m.
- Assuming it ?cooks? raw food: Most lunchbox warmers are not designed for raw meat safety.
FAQ: Commercial Vehicle Food Warmers
1) Can I use a food warmer while driving?
Yes, and that?s the most common use case. The key is securing the warmer so it can?t tip, routing the power cable away from pedals and controls, and setting it up before you start moving so you?re not adjusting it in traffic.
2) Will a 12V food warmer kill my car battery?
It can if you run it for long periods with the engine off, especially with higher-watt models or an older battery. As a habit, run it while the engine is on, or use an auxiliary battery/power station for extended warming during engine-off breaks.
3) What?s better: a 12V lunchbox warmer or an inverter with a home appliance?
For most drivers, a purpose-built 12V/24V warmer is simpler and safer. Inverter setups offer flexibility but require correct wiring, fusing, and mounting. If you?re not comfortable with electrical upgrades, stick to a dedicated vehicle warmer.
4) How long does it take to heat food in a vehicle warmer?
Typical range is 45?90 minutes depending on portion size, starting temperature, and wattage. Pre-cooked, refrigerated meals heat faster than frozen meals. Dense foods (thick casseroles, large rice portions) take longer unless stirred.
5) Can I heat food in a commercial truck (24V system)?
Yes, but confirm the warmer supports 24V or use a proper 24V-to-12V converter rated for the warmer?s wattage. Plugging a 12V-only warmer directly into a 24V outlet can destroy the unit.
6) How do I keep my cab from smelling like food?
Use a well-sealed container, wipe condensation from the lid after eating, and take trash out at every stop. Meals with strong aromas (fish, certain curries) are better saved for when you can ventilate the cab or eat outside.
Next Steps: Build a Warmer Setup That Fits Your Route
Start by choosing the warmer type that matches your vehicle voltage and your daily schedule. Then focus on the details that make it reliable: a stable mounting spot, safe cable routing, and a realistic heating timeline based on your route. Once you dial it in, you?ll spend less time hunting for food and more time staying fueled with meals you actually enjoy.
If you?re ready to upgrade further, consider adding a dedicated 12V outlet, a higher-quality splitter with proper fusing, or an auxiliary power solution for engine-off breaks.
For more practical cabin upgrades, power tips, and interior gear guides, explore more articles on carinteriormix.com.